Synology released a stable version of Virtual Machine Manager extension for DSM OS, which runs on the Synology NAS boxes. This extension uses KVM/QEMU and allows execution of VMs on the Synology boxes.
Obviously you can install VMs each time using an iso image and installer. However, if you would like to use this feature for some Linux playgrounds (or maybe you want to deploy many VMs?) you would probably like to create a prepared VM template and create new VMs using this template. This blog post covers exactly this case: creation of CentOS template, which can be used for fast and easy deployment of further VMs on the Synology. Image templates with Ubuntu or other Linux distributions can be prepared on the similar way.
- Install VirtualBox and download the CentOS installer ISO image
- Create a new VM, with 10GB HDD (VDI, dyn allocated), 512MB RAM, remove USB devices, remove audio, set network to paravirtualized network
- Install CentOS with using LVM and following layout:
- 1G /boot - dedicated partition
- 1G swap - LVM volume
- 8G root - LVM volume
- uninstall network manager and firewalld (if you do not need them)
yum -y remove NetworkManager NetworkManager-libnm firewalld && yum -y autoremove - do a full system update with
yum -y update - upload ssh keys for remote access
$ mkdir .ssh
$ cat > .ssh/authorized_keys <<EOF
PUBLIC-SSH-KEY
EOF
$ chmod 700 .ssh
$ chmod 600 .ssh/authorized_keys
# optionally remove the root password
$ usermod -p '*' root- install qemu guest agent. This agent provides information of VM, like IP, hostname to the Virtual Machine Manager
$ yum -y install qemu-guest-agent
$ systemctl enable qemu-guest-agent- Cleanup the network configuration and enforce usage of DHCP:
$ cat > /etc/sysconfig/network-scripts/ifcfg-eth0 <<EOF
TYPE="Ethernet"
BOOTPROTO="dhcp"
DEFROUTE="yes"
IPV4_FAILURE_FATAL="no"
IPV6INIT="yes"
IPV6_AUTOCONF="yes"
IPV6_DEFROUTE="yes"
IPV6_FAILURE_FATAL="no"
IPV6_ADDR_GEN_MODE="stable-privacy"
NAME="eth0"
DEVICE="eth0"
ONBOOT="yes"
EOF- Create the firstboot script
This script is used to extend the root partition on the first boot of VM
$ cat > /usr/local/libexec/firstboot <<EOF
#!/bin/sh
#
# This script gets executed on the first boot

yum -y install cloud-utils-growpart
growpart /dev/sda 2
pvresize /dev/sda2
lvresize -l +100%FREE -r /dev/centos/root

yum -y update
systemctl disable firstboot
reboot
EOF
$ chmod +x /usr/local/libexec/firstboot
$ cat > /etc/systemd/system/firstboot.service <<EOF
[Unit]
Description=Firstboot script
After=network.target

[Service]
Type=oneshot

ExecStart=/usr/local/libexec/firstboot

[Install]
WantedBy=multi-user.target
EOF- Create image cleanup script and prepare VM for export
$ cat > /usr/local/libexec/cleanup-image <<EOF
#!/bin/sh
#
# Prepare image, cleanup ssh keys etc

systemctl enable firstboot
rm -f /etc/ssh/*_key /etc/ssh/*_key.pub
yum clean all
rm -rf /var/cache/yum
init 0
EOF
$ chmod +x /usr/local/libexec/cleanup-image
$ /usr/local/libexec/cleanup-image
Export the VM in OVA format to some place
untar the OVA file:
$ tar xfv centos.ova
x centos.ovf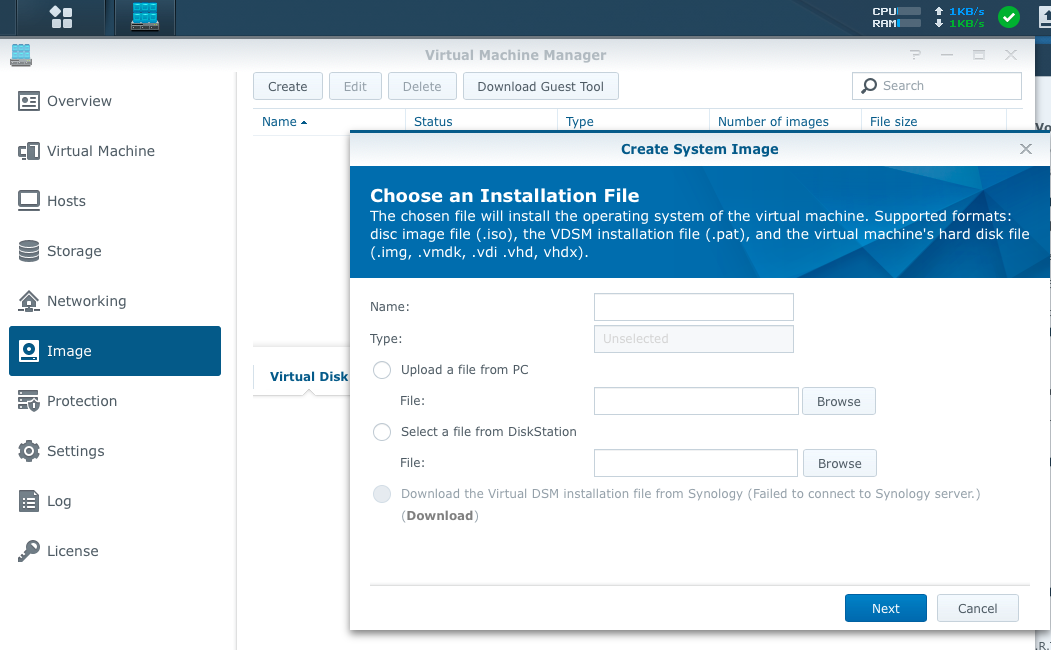
x centos-disk001.vmdk- Go to the Virtual Machine Manager of Synology and choose
Image -> Createand upload the VMDK file
- To create a new VM choose
Virtual Machine -> Create -> Import from a disk imageand select the imported image
